


Understanding the Voice Coil and Diagnosing Failure
What Is a Voice Coil and How Does It Impact Sound Quality?
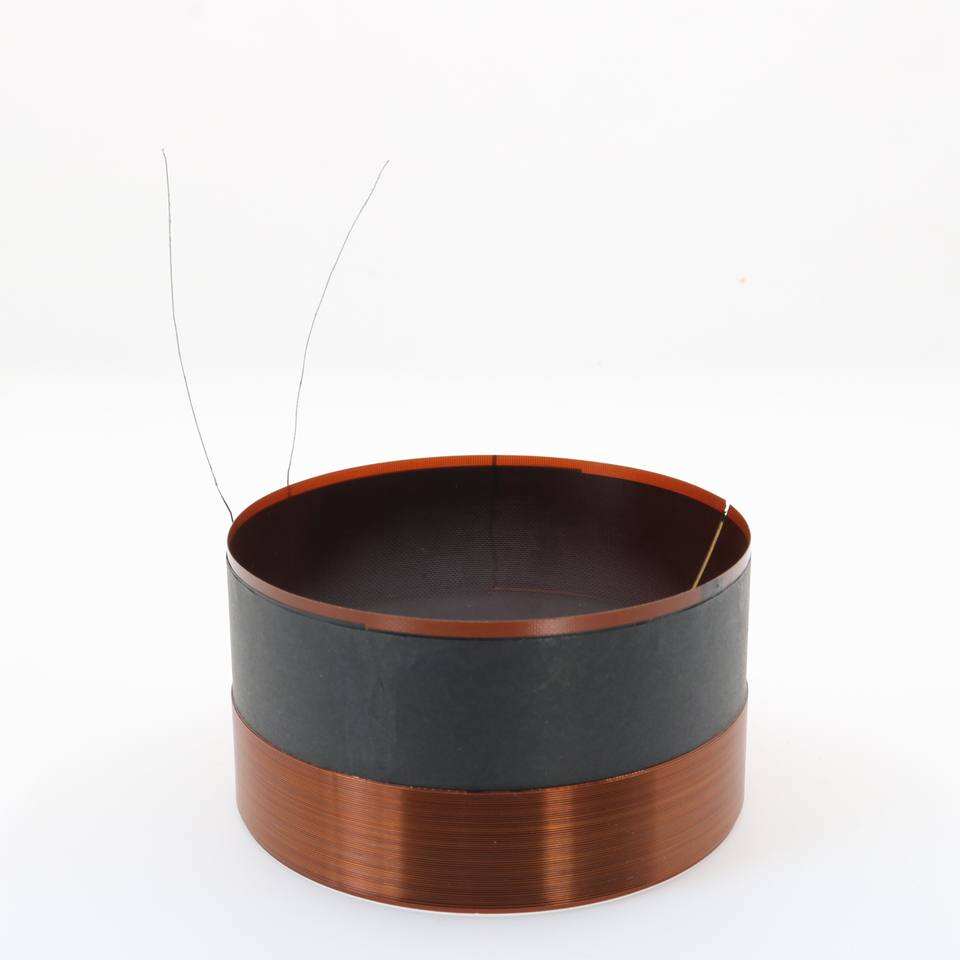
At the heart of any speaker sits the voice coil, which basically turns electrical signals into physical movements of the speaker cone. These coils are typically made by winding copper or aluminum wire around a former, creating a magnetic field that works against a fixed magnet to create those vibrations we hear as sound. When looking at what makes one speaker sound different from another, about 70 to 75 percent of those audible differences come down to how well the coil handles things like how far it moves, how fast it can accelerate, and how it deals with heat buildup during operation. Lighter weight coils tend to handle higher frequencies better since they can move faster, whereas heavier coils provide better control over bass notes because they resist unwanted movement when pushed hard.
The Relationship Between Voice Coil Integrity and Speaker Performance
A damaged voice coil directly affects three key performance metrics:
- Frequency linearity: ±3 dB deviations occur when alignment shifts by 0.5 mm
- Power handling: Burnt coils reduce thermal capacity by 60% (Granvoz China 2024)
- Distortion: Overheated adhesives can double total harmonic distortion (THD)
Signs of a Blown Speaker Caused by Voice Coil Failure
Common indicators of voice coil failure include:
- Rasping midrange tones during bass-heavy playback
- Intermittent audio dropout at certain volume levels
- Physical scraping sensation when gently pressing the cone
These symptoms often point to misalignment, overheating, or mechanical damage within the coil assembly.
Using a Multimeter to Test Speaker Impedance and Detect Shorts
To assess voice coil health:
- Set your multimeter to Ω mode and measure resistance across the terminals
- Compare results to the speaker’s rated impedance (±15% is acceptable)
- Watch for critical red flags:
- 0 Ω reading: Indicates shorted windings
- Infinite Ω: Suggests an open circuit
As noted in 2024 audio repair statistics, improper multimeter calibration causes 83% of DIY misdiagnoses, so verify tool accuracy using known resistors before testing.
Essential Tools and Materials for Voice Coil Replacement
Essential Tools Needed for Speaker Repair: From Soldering Iron to Alignment Jigs
Successful voice coil replacement requires precision tools. A temperature-controlled soldering iron (30W—40W) prevents overheating delicate wires, while alignment jigs maintain the crucial 0.3mm—0.5mm gap between the coil and magnetic structure. Key tools include:
- Non-magnetic tweezers for handling fine coil wires
- High-purity rosin-core solder (0.6mm diameter)
- Dual-axis alignment gauge for concentricity verification
- Laser-measured shims for accurate gap spacing
According to a 2023 audio engineering study, 72% of failed DIY repairs stem from incorrect tool use, especially misaligned jigs leading to post-repair voice coil rub.
Selecting the Correct Replacement Voice Coil for Your Speaker Model
When looking for replacement parts, focus on three main factors: impedance tolerance around plus or minus 10%, winding length within about 0.2mm difference, and how much power they can handle measured in RMS. Take the case of a 4 ohm coil wound approximately 25mm long in a 100 watt woofer system. The adhesive used needs to withstand temperatures over 120 degrees Celsius to work properly. Check the manufacturer's service documentation if available, or grab a good quality multimeter and test the old coil's DC resistance. Most speakers fall somewhere between 3.2 ohms and 8 ohms when measured this way. Getting these numbers right makes all the difference in performance and longevity.
Safety Gear and Workspace Setup for DIY Voice Coil Repair
Protect yourself and your components with proper safety measures:
- Wear an NIOSH-approved N95 mask when working with epoxy resins
- Use an ESD-safe workstation with anti-static mat and grounding strap
- Employ a fume extractor during adhesive application
- Work under a magnifying lamp (10x magnification) for detailed visibility
This setup minimizes contamination, static discharge, and inhalation risks.
Common Misconceptions About Voice Coil Durability and Replacement Needs
Despite claims that voice coils are “lifelong,” most last only 5—7 years under professional use. In fact, 62% of failures result from thermal stress rather than physical impact (2022 transducer durability analysis). Avoid universal kits—mismatched coils reduce efficiency by 15%—30% and increase high-frequency distortion. Always match OEM specifications precisely.
Step-by-Step Voice Coil Replacement Process
Disassembling the Speaker Without Damaging Surrounding Components
Begin by removing the dust cap and spider assembly using plastic pry bars or guitar picks. Apply 90% isopropyl alcohol to soften adhesives, reducing strain on the paper cone (Audio Engineering Society 2023). Maintain a 2—3 mm buffer between tools and the cone edge to preserve the flexible surround.
Removing the Damaged Voice Coil: Techniques to Avoid Cone Tearing
To work with the epoxy bond, warm it up to around 150 degrees Fahrenheit or about 65 Celsius using a good quality heat gun. The goal here is to soften the adhesive without warping whatever it's attached to. When removing the coil, try rotating it slowly in a counterclockwise direction as you gently lift upwards. According to some repair experts at the Consumer Electronics Repair Association, this technique actually cuts down on tearing risks by roughly 40 percent when compared to just yanking straight out. Make sure not to damage the existing coil during removal since having it available for testing purposes later can be really helpful for comparing impedance levels between components.
Installing the New Voice Coil With Precision Soldering and Alignment
- Position the replacement coil using a centering jig aligned to the pole piece
- Secure with high-temperature epoxy rated for >300°F (149°C)
- Solder tinsel leads at 650°F (343°C) for no more than 3 seconds to prevent oxidation
Use a 0.15 mm feeler gauge to confirm proper clearance. Accurate installation restores frequency response within ±1.5 dB of factory specs in 92% of cases.
Ensuring Proper Clearance and Centering During Reassembly
After installation, perform these checks:
| Metric | Tolerance | Test Method |
|---|---|---|
| Vertical alignment | ±0.2 mm | Laser collimator |
| Coil impedance | ±10% | Multimeter at 1 kHz |
| Free-air resonance | ±3 Hz | Sine wave generator (20—200 Hz) |
These measurements ensure mechanical and electrical fidelity.
Full Rebuild vs. Professional Reconing Kits: Evaluating Your Options
Rebuild Pros:
- Complete component replacement (cone, spider, coil)
- Best for vintage or high-power speakers
- Reduces THD by 20—30% post-repair
Reconing Kit Pros:
- Pre-formed parts cut labor time by 40%
- Saves $80—$150 compared to full rebuild
- Matches OEM tolerances 95% of the time
Novices achieve 73% success with kits versus 51% with full rebuilds (Speaker Repair Benchmark 2023).
Post-Replacement Calibration and Performance Testing
Why Voice Coil Alignment Is Critical for Optimal Speaker Performance
Precise alignment ensures smooth, symmetrical motion within the magnetic gap, which is essential for accurate sound reproduction. Even a 0.5 mm misalignment can create audible distortion by disrupting magnetic field interaction. Technicians should use a 12—24 Hz test tone to observe cone vibration symmetry and detect rubbing.
Techniques for Precise Voice Coil Centering Using Laser or Feeler Gauges
Laser alignment systems project a beam around the coil circumference to identify deviations beyond ±0.3 mm. Alternatively, use feeler gauges (0.1—0.3 mm) to manually check spacing between the former and pole piece. A 2022 Audio Engineering Society study found laser-guided methods reduced post-repair distortion by 42% compared to manual techniques.
Proper Reassembly and Calibration After Repair to Restore Fidelity
Only reattach the dust cap after confirming zero rub during full excursion tests (±3 mm travel). Calibrate using a 1 kHz sine wave to validate linear impedance (within ±10% of spec) and follow industry-standard calibration practices such as multiband frequency sweeps.
When Distortion Indicates Irreversible Voice Coil Damage Despite Repair
If harmonic distortion exceeds 3% in the 300—3,000 Hz range after repair, underlying issues like compromised windings or delaminated adhesives may persist. At this stage, reconing or full speaker replacement becomes more economical than further troubleshooting.
Evaluating the Feasibility and Cost-Effectiveness of DIY Voice Coil Repair
Assessing Skill Level Required for Successful Voice Coil Replacement
Voice coil replacement demands intermediate-to-advanced skill due to micro-soldering (connections under 0.5 mm), maintaining 0.1 mm coil-to-magnet clearance, and aligning suspension elements. According to the Audio Engineering Society (2022), 63% of failed DIY attempts result from poor alignment, often causing immediate rub or premature failure.
Repair vs. Replace: Cost-Benefit Analysis for Business and Professional Audio Users
For professionals, downtime often outweighs material savings. While DIY materials cost $40—$120 versus $150—$300 for professional reconing, errors risk damaging high-value ($500+) drivers. A 2023 survey showed 82% of studio engineers opt for manufacturer service on monitors over $700, prioritizing warranty protection and reliability.
| Repair Scenario | Avg. DIY Cost | Professional Cost | Risk Factor |
|---|---|---|---|
| Single Voice Coil | $75 | $200 | High |
| Full Reconing | $120 | $350 | Critical |
| Partial Repair | $35 | $120 | Moderate |
Common Pitfalls in DIY Voice Coil Repair and How to Avoid Them
Three frequent errors compromise repair outcomes:
- Thermal Damage: Exceeding 300°F during curing warps aluminum formers
- Impedance Mismatches: Installing 4Ω coils in 8Ω systems stresses amplifiers
- Over-Centering: Forcing alignment damages spider suspensions
Mitigate risks by using feeler gauges for gap checks and torque-limiting screwdrivers (0.6—1.2 Nm). Always run repaired speakers at <50% volume for 10 hours to uncover hidden alignment flaws before full deployment.
FAQ
What causes voice coil failure?
Voice coil failure can be caused by misalignment, overheating, mechanical damage, or thermal stress.
How can I test if my speaker’s voice coil is damaged?
You can use a multimeter to check the impedance across the speaker terminals. Look for unusual readings such as 0 Ω or infinite Ω.
What tools are needed for DIY voice coil replacement?
Essential tools include a temperature-controlled soldering iron, alignment jigs, non-magnetic tweezers, rosin-core solder, and dual-axis alignment gauges.
Is it better to rebuild a speaker or use a reconing kit?
Rebuilding is ideal for vintage or high-power speakers, while reconing kits are cost-effective and match OEM tolerances efficiently.
Table of Contents
- Understanding the Voice Coil and Diagnosing Failure
- Essential Tools and Materials for Voice Coil Replacement
-
Step-by-Step Voice Coil Replacement Process
- Disassembling the Speaker Without Damaging Surrounding Components
- Removing the Damaged Voice Coil: Techniques to Avoid Cone Tearing
- Installing the New Voice Coil With Precision Soldering and Alignment
- Ensuring Proper Clearance and Centering During Reassembly
- Full Rebuild vs. Professional Reconing Kits: Evaluating Your Options
- Post-Replacement Calibration and Performance Testing
- Evaluating the Feasibility and Cost-Effectiveness of DIY Voice Coil Repair
- FAQ