


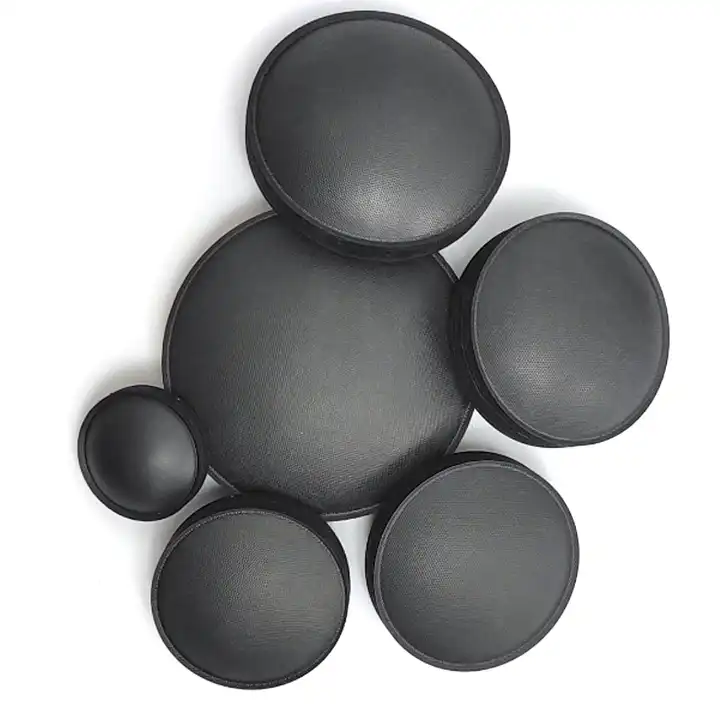
Why the Dust Cap Matters: Function, Failure Modes, and Diagnostic Signs
The dust cap acts as an important shield protecting what's inside your speakers. Main job? Keeping dust out of the voice coil area where it belongs. When dirt gets into that tight space between coils, it creates friction that leads to distorted sound quality. Worse still, over time this buildup can actually ruin the voice coil itself. Without proper protection, tiny particles collect on surfaces, messing with how air moves through the speaker, making sounds less crisp and clear. Dust caps tend to fail in several ways too. They might develop small cracks from regular use, lose their stickiness when exposed to heat or humidity changes, or bend out of shape after getting bumped around or soaked in moisture. Look closely at the dust cap for any signs of damage like holes, loose edges, or weird shapes. Listen carefully while playing music - if there's buzzing when bass kicks in, fuzzy midrange tones, or weak high notes, something's probably wrong. Catching problems early saves money down the road and keeps those precious audio systems sounding good for years.
Safe, Non-Destructive Dust Cap Cleaning Methods by Material Type
Gentle, material-appropriate cleaning preserves dust cap integrity while restoring airflow and tonal balance. Aggressive techniques risk fiber tearing in paper caps or coating dissolution in plastic variants—both of which degrade acoustic performance and accelerate aging.
Low-pressure vacuuming for paper and fabric dust caps
Place the soft bristle vacuum nozzle about an inch or so away from whatever surface needs cleaning, and keep the suction really gentle. Making light sweeping motions across the surface helps pick up dust without messing with those fragile dome structures. Important note: always hold the cone steady while working on it because paper caps tend to rip even at pressures around half a psi according to some tests done in the industry. When dealing with stuff stuck deeper inside, try angling the nozzle instead of going straight down with full force. Wrap things up by running a dry brush made from natural hair over everything to get rid of any remaining bits. Most people find this approach brings back roughly 90 something percent of the original airflow without harming fibers, though results might vary depending on how bad things got messed up initially.
Static-free microfiber wiping for plastic and coated dust caps
Take an anti-static microfiber cloth and give it a good soak in distilled water, then wring out most of the moisture so it's just damp enough to work with. Start wiping from the center of the dome moving outward in straight lines rather than circles. The radial motion works better for picking up dust particles without damaging surfaces. When cleaning, circular movements actually trap dirt in the fabric instead of spreading it around, which helps avoid scratches on sensitive components. Stay away from those store bought cleaners with alcohol or ammonia in them because they can really mess up the protective coatings and damage the electrostatic properties needed for proper driver function. If there's stubborn grime left behind, grab some rubbing alcohol (less than 40% concentration works fine) and dab it onto the cloth first before touching the cap surface. Applying it directly might cause problems like swelling or cloudiness in the finish over time.
When Cleaning Isn’t Enough: Assessing and Performing Dust Cap Replacement
Visual and tactile diagnostics: Identifying irreversible damage (cracks, delamination, warping)
Irreparable damage requires prompt replacement to avoid voice coil contamination and progressive acoustic degradation. Diagnose using:
- Visual inspection: Examine under bright, angled light for hairline cracks, edge lifting (delamination), or asymmetric warping. Microfractures—often invisible to the untrained eye—contribute to over 65% of undetected midrange distortion cases.
- Tactile assessment: Gently probe the perimeter with a cotton swab. Brittle texture, spongy detachment, or audible “crackling” indicates advanced material breakdown. Delaminated caps frequently generate midrange buzzing due to uncontrolled diaphragm vibration.
- Damage thresholds: Replace if cracks exceed 1 mm, warping introduces >5° cone misalignment, or adhesive failure affects >30% of the perimeter. These conditions impair damping control and expose the voice coil to environmental contaminants.
Step-by-step dust cap replacement: Removal, driver surface prep, and adhesive selection guidelines
Follow this precise workflow to ensure structural and acoustic fidelity:
-
Safe removal
Apply isopropyl alcohol around the cap’s perimeter with a microbrush. Allow 90 seconds for solvent action, then gently lift edges using a non-marring dental pick. Never force detachment—excessive heat or leverage risks thermal damage to the voice coil former or spider suspension. -
Surface preparation
Step Tool Critical Check Residue removal Silicone-free solvent (e.g., Techspray Electro-Wash) Zero adhesive remnants on cone or surround De-greasing Lint-free swab with distilled water Oil-free, contaminant-free surface Alignment marking Non-permanent fine-tip pen Centered crosshairs aligned to cone apex -
Adhesive selection
Match adhesive chemistry to cap material and performance requirements:
- Paper/fabric: Flexible latex-based adhesive (2–4 hour tack-up, full flexibility retained)
- Plastic/composite: Slow-cure cyanoacrylate (24-hour full cure, minimal shrinkage)
- Metal/aluminum: Two-part epoxy with vibration-dampening fillers (72-hour full bond, optimal for high-excursion drivers)
Apply adhesive as a continuous, uniform bead ≈1 mm in diameter. Position the new cap within 15 seconds of application—initial set begins rapidly. Cure under precisely 200 g of evenly distributed weight with optical alignment verification; even 0.5 mm radial offset induces measurable frequency response deviations (±3 dB at 1 kHz).
Material Selection and Sonic Impact of Dust Cap Upgrades
When replacing a damaged dust cap on speakers, there's actually a chance to tweak how they sound beyond just fixing what's broken. What material gets used affects several key factors like weight, firmness, and how vibrations get absorbed, all playing into how frequencies respond and whether distortion happens. Paper and fabric blends tend to give pretty straightforward sound with little added character, though they don't last long under stress. Plastic and metal alternatives hold up better over time but come with extra weight that might muffle those high notes past around 5kHz. Traditional dome shapes keep things sounding natural with good directional control, whereas upside down designs make cones stiffer, cutting down on unpleasant distortions when pushing speakers hard. Those wavy patterned caps spread sound wider across the room, making it easier to hear from different angles and creating a bigger sweet spot for optimal listening. For serious audio setups where every detail matters, keeping the same weight and shape as original is still important, although newer materials like specially treated aramid composites can really cut down on unwanted distortions without messing up the overall tonal quality.
FAQs
What are common causes of dust cap failure?
Common causes include exposure to heat or humidity, physical impacts, and regular wear and tear. These factors can lead to cracks, stickiness loss, and general deformation.
How can I safely clean my dust caps?
Use low-pressure vacuuming for paper and fabric dust caps, and static-free microfiber wiping for plastic and coated dust caps. Avoid aggressive cleaning methods that can damage the material or coatings.
What should I consider when replacing a dust cap?
When replacing, ensure the replacement maintains the original shape and weight for sound consistency. Choose an adhesive that matches the cap's material and its performance requirements.
How do dust cap materials affect speaker sound?
Material affects factors like weight and vibration absorption, which influence frequency response and distortion. Paper gives a straightforward sound while plastic and metal provide durability at the cost of potential high-frequency muffling.